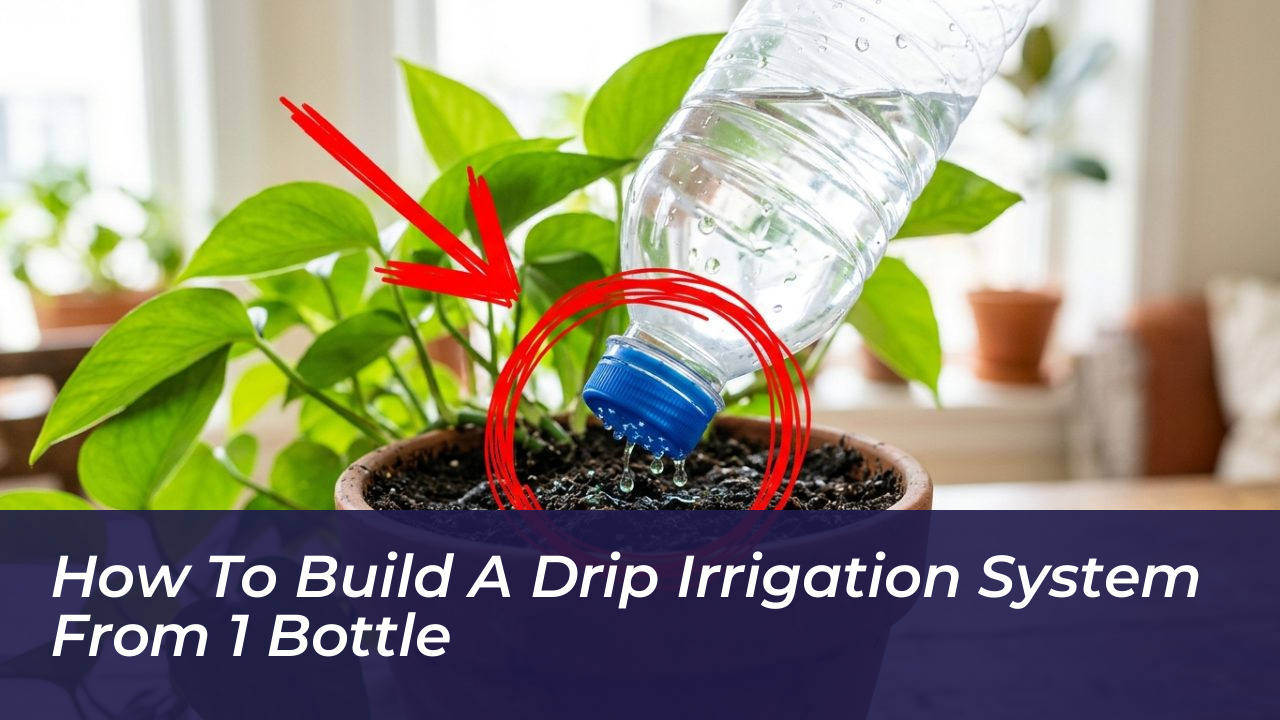

Using just 1 recycled plastic bottle is all it takes to keep your indoor container plants hydrated when you are away from home or busy during the workweek. Instead of letting empty beverage containers pile up in your recycling bin, you can easily convert them into an efficient, slow-release self-watering setup. By piercing the cap and burying the bottle neck upside down in potting soil, you create a steady trickle of moisture that protects potted greens from drying out without requiring expensive commercial equipment.
This technique offers an effective, low-cost solution for indoor houseplants, patio containers, and small garden crops. Rather than risking root desiccation or relying on complex automated timers, an inverted reservoir provides an even distribution of moisture right where roots need it most. The entire setup relies on simple gravity and controlled flow, ensuring your plants receive consistent hydration without waterlogging.
Essential Materials for Assembly
Before you begin assembling your DIY automatic watering system, gather the following household items:
- An empty, clean plastic bottle (such as a 0.5L, 1.5L, or 2L container) complete with its original screw-on cap.
- Clean tap water sufficient to fill the container.
- A drill fitted with a fine bit, a hot nail, or a sharp puncture tool capable of making tiny, controlled holes.
- A small garden trowel, stick, or dibber to create a dedicated pocket in the soil without tearing root structures.
Thoroughly rinsing the container before assembly prevents sugary residues or beverage additives from leaching into your potting mix. Precision during the drilling phase is equally vital; an oversized hole will drain the reservoir within minutes, entirely defeating the purpose of slow hydration.
Step-by-Step Guide to Installing Your DIY Drip Irrigation System
Follow these precise steps to calibrate and position your drip irrigation unit safely without harming fragile root balls:
1. Perforate the Cap
Remove the screw cap and place it on a scrap piece of wood. Pierce one to five tiny, controlled holes into the plastic using your fine drill bit or a heated nail. Keep the openings minimal so moisture seeps out gradually over days rather than hours.
2. Fill and Seal
Fill the plastic container with clean tap water, then screw the perforated cap back on tightly. A properly sealed cap maintains an internal vacuum, which prevents the water from rushing out all at once.
3. Prepare the Planting Bed
Using a narrow stick or planting tool, open a small pocket in the soil near the container’s edge, roughly 4 to 6 inches away from the main stems of your houseplant. Making this preliminary hole prevents accidental damage to established root systems.
4. Invert and Secure
Turn the container upside down and insert the bottleneck firmly into the prepared hole. Ensure the bottle stands stable and cannot tip over under its own weight. You can bury the lower portion or neck deeply enough to anchor it securely.
5. Monitor the Flow Rate
Check the water line over the first few hours. If the level drops too fast, your holes are too large; if it fails to move at all, clear soil particles away from the cap openings or check for proper air intake.
Plant Compatibility: Matching Species to Slow-Release Moisture
A widespread misconception among beginner gardeners is that automated bottle watering benefits every houseplant equally. In reality, constant moisture can prove fatal to drought-tolerant varieties that require a distinct wet-to-dry cycle.
- Indoor Tropicals and Leafy Greens: Ideal. Varieties like pothos, peace lilies, and ferns benefit tremendously from steady root moisture.
- Outdoor Potted Annuals and Herbs: Recommended. Sustains hydration between routine waterings on hot patios and balconies.
- Cacti and Desert Succulents: Not recommended. Succulents require their soil to dry out fully between waterings to prevent fatal fungal root rot.
Troubleshooting Common DIY Irrigation Issues
Even with careful preparation, you might encounter minor hurdles when setting up your recycled bottle waterer. Here is how to fix them quickly:
- The bottle empties in just a few hours: Your drainage holes are too wide. Replace the cap, or insert a tiny piece of sponge inside the cap to create extra resistance against the water flow.
- Water refuses to drip at all: Soil may have packed too tightly against the cap, or an air vacuum formed inside an unvented bottle. Clear the openings and ensure air can enter the reservoir if using side-vented designs.
- The bottle tips over: Bury the neck deeper into the potting mix or use a small garden stake and twine to secure the upper body of the container upright.
By transforming 1 recycled plastic bottle into a targeted hydration tool, you embrace sustainable urban gardening while keeping your indoor plants thriving during busy weeks away from home.