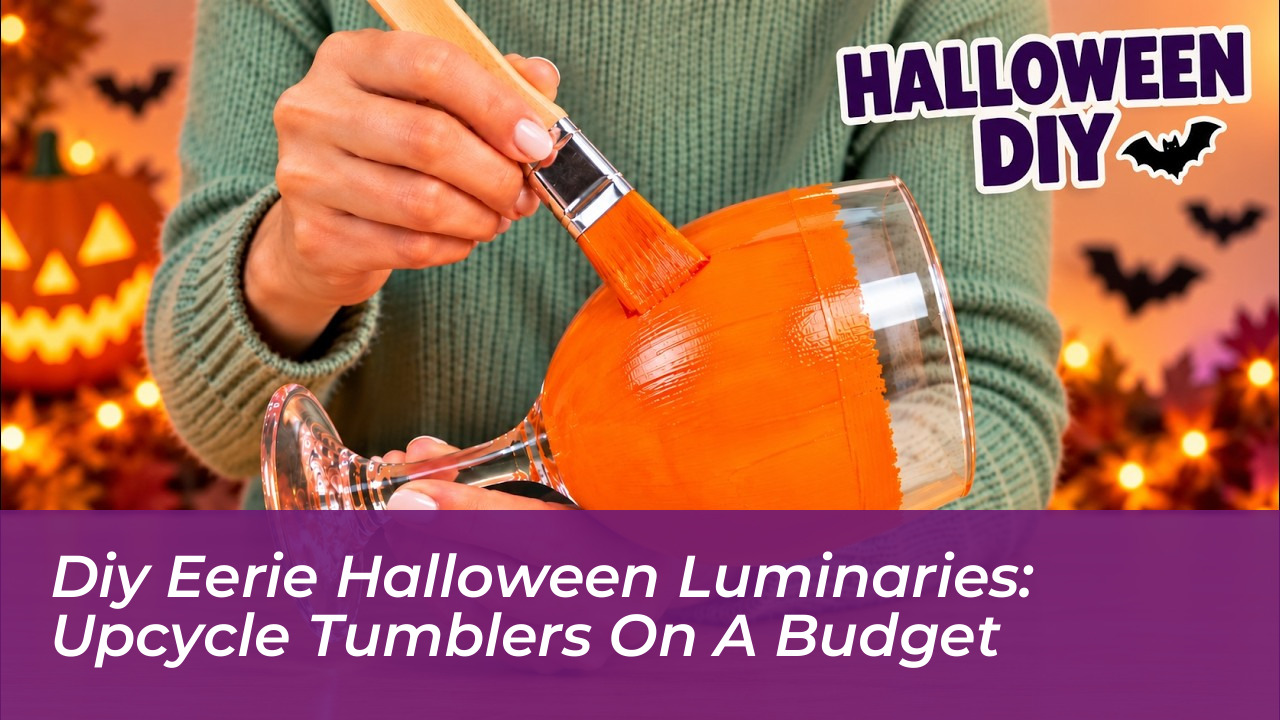

As autumn arrives, stores are often flooded with expensive seasonal decorations that contribute to unnecessary waste. Instead of buying disposable plastic trinkets, many households are choosing a more sustainable path: transforming ordinary kitchen tumblers and thrifted glassware into bespoke, eerie Halloween luminaries. This project breathes new life into neglected cupboard items, creating high-impact atmospheric lighting for very little cost.
The Appeal of Upcycled Glassware
Glass is an ideal medium for seasonal lighting because it refracts and diffuses light beautifully. By using mismatched highball tumblers, water glasses, or dessert dishes, you can achieve a unique, haunted aesthetic that uniform, store-bought sets cannot replicate. Charity shops are excellent sources for these vessels, often selling them for less than a pound each. Even glassware with minor scratches or cloudiness works well, as these imperfections add to an aged, vintage look once illuminated.
Essential Supplies
Creating these displays requires only basic household items, making it a low-stress and child-friendly craft. Before you begin, gather the following:
- Glassware: Clear or coloured tumblers, water glasses, or jars with smooth walls.
- Diffusing Base: Orange, lime green, or white tissue paper, or water-based matte acrylic craft paint.
- Silhouette Accents: Black cardstock, vinyl decals, or dark sugar paper cut into motifs like bats, jack-o’-lantern faces, or creepy trees.
- Adhesive: Standard PVA glue diluted with a little water, or a decoupage varnish like Mod Podge.
- Illumination: Battery-operated LED tea lights or warm fairy lights.
Step-by-Step Assembly
- Clean the Glass: Wash your glassware thoroughly in warm, soapy water to remove oils and dust. For a better adhesive bond, wipe the exterior with a cloth dampened with rubbing alcohol.
- Apply the Base: Use a brush or sponge to apply a thin layer of diluted PVA glue to the exterior. Smooth strips of tissue paper over the surface, overlapping them slightly to create a textured, luminous background.
- Add Silhouettes: Once the base is tacky, press your black paper silhouettes firmly onto the glass.
- Seal the Design: Apply a final topcoat of PVA glue or decoupage varnish. This will dry clear, providing a protective sheen that keeps your design intact.
Safety and Longevity
Safety should always be the priority. Standard glassware is not designed to withstand the heat of traditional wax candles, which can cause the glass to crack or shatter. Always use battery-operated LED tea lights. These alternatives are cool to the touch, smoke-free, and often include timers that allow your display to glow automatically at dusk.
Creative Styling Tips
For the best visual impact, arrange your finished luminaries in clusters of three or five, varying the heights to create depth on a mantel or console table. If you are creating an outdoor display for trick-or-treaters, place your glass creations inside a sheltered lantern or on a dry doorstep, paired with miniature squashes and dried autumn leaves. This flickering glow provides a festive welcome while protecting your handmade art from the elements.
Upcycling everyday items is a rewarding way to celebrate the season sustainably, turning forgotten kitchenware into captivating, eerie decor.