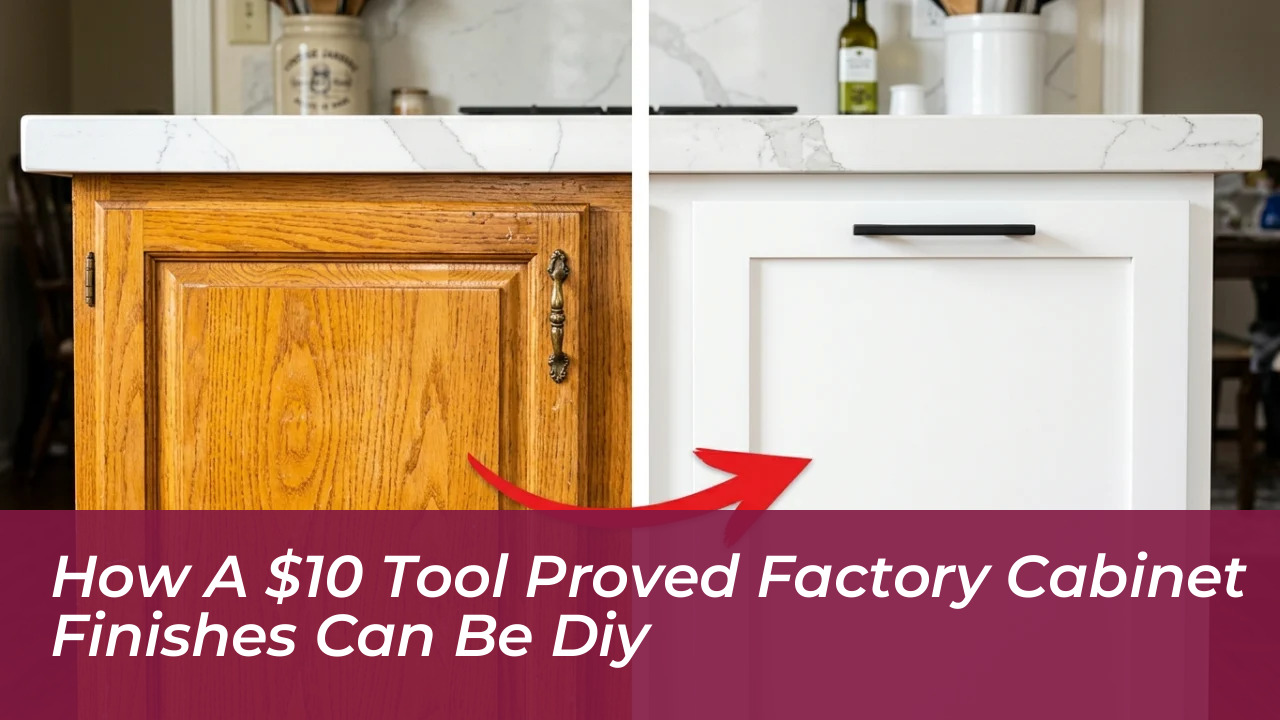

Professional cabinet refinishing typically costs between $4,000 and $10,000. This high price is driven by specialized pneumatic tools and intensive labor. However, one couple eliminated that expense. They turned dated early-2000s honey oak cabinets into a factory-smooth showpiece using a $9.99 discount spray gun and targeted preparation techniques. By pairing systematic deconstruction with modern coatings, they bridged the visual clash between newly installed calacatta quartz countertops and aging woodwork without hiring a crew.
The project began when the warm, orange tones of the existing oak clashed sharply with the bright white surface and soft gray veining of new quartz slabs. While traditional advice often dictates choosing between tedious hand-brushing or spending thousands on professional contractors, strategic DIY methods deliver an identical result at a fraction of the price.
The Gear Behind the $10 Solution
The visible difference between an amateur paint job and an authentic factory look comes down to the application method. Traditional bristle brushes and foam rollers leave distinct stipple and brush marks. In contrast, a high-volume, low-pressure (HVLP) gun atomizes paint to create an uninterrupted, flat coat. Rather than renting commercial equipment, the project utilized a Central Pneumatic 20-ounce gravity-feed HVLP gun purchased on sale for $9.99 from Harbor Freight.
Operating an entry-level spray setup successfully requires maintaining consistent line pressure and dry air delivery. The setup relied on an 8-gallon McGraw air compressor paired with essential inline modifications to prevent defects before paint ever hit the wood:
- Dual Regulators: Setting inline regulators at both the tank and the gun kept working pressure steady between 55 and 60 PSI.
- Moisture Filtration: Adding an inline moisture trap eliminated water vapor condensation from contaminating the paint stream.
- Sealed Connections: Applying Teflon tape across all pneumatic threads stopped micro-leaks that cause erratic pressure drops.
- Staging Gear: Basic $8.99 plastic sawhorses and a $1.49 blue tarp formed an efficient spray booth inside the garage.
Bypassing the Sanding Trap: Chemical Deglossing
A widespread misconception in cabinet refinishing is that achieving proper adhesion requires hours of abrasive orbital or hand sanding. Manually sanding more than 30 profiled cabinet doors and drawer fronts can easily consume 15 hours of physical strain while creating airborne dust hazards.
Instead, the prep phase utilized Klean-Strip Liquid Sandpaper. This chemical deglosser strips built-up kitchen grease and softens the existing clear polyurethane topcoat in a single wipedown. The chemical action etches the substrate microscopically, giving subsequent coatings adequate tooth without compromising the underlying grain profile.
Blocking Oak Tannins with Shellac
Oak presents a stubborn finishing obstacle: a deep porous grain filled with natural tannins that bleed through standard latex primers as yellow or orange stains. To prevent discoloration, applying an impenetrable barrier coat is mandatory.
The solution was Zinsser B-I-N shellac-based primer, an alcohol-based formula renowned for permanent stain-blocking. Because shellac dries rapidly and exhibits heavy viscosity, passing it through an entry-level spray gun risks severe clogs. Hand-applying the primer with brushes and mini rollers laid the essential foundation, followed by denatured alcohol cleanup.
A critical rule when filling obsolete hardware holes: always overfill the void slightly. Standard wood filler shrinks as solvents evaporate, creating noticeable indentations beneath subsequent coats.
Executing the Spray Application
Achieving a smooth finish depends on using top-tier paint formulated specifically for cabinetry wear. While budget equipment handled the spraying mechanics, the coatings utilized Sherwin-Williams Emerald Urethane Trim Enamel in a satin sheen.
This hybrid coating combines the flow characteristics of oil-based paints with the low odor and cleanup ease of waterborne formulations. When delivered at 55 to 60 PSI, a single cup of paint easily coated one complete side of every door. The leveled film dried uniformly without orange peel or runs.
Blending Sprayed Doors with Hand-Rolled Frames
Fully encapsulating an active kitchen interior to spray stationary face frames requires extensive masking and ventilation control. To bypass that hurdle, the perimeter cabinet boxes were coated manually using high-density foam rollers and angled trim brushes.
Because the urethane trim enamel features extended open-time leveling capabilities, the hand-painted frame surfaces smoothed out completely, matching the sprayed finish of the reinstallable doors.
Avoiding Costly Reassembly Pitfalls
Careful execution during the painting phase can still be undone by disorganized hardware tracking during disassembly. Storing all removed screws and hinges indiscriminately in a single container leads to major delays during final alignment.
Cabinet hinges undergo micro-adjustments during their original installation to hang level against specific frame openings. When hinges are mixed up, every individual door requires manual re-truing via the adjustment screws, adding hours of tedious corrective work. Hardware placement errors also occurred during handle drilling. Constructing a custom drilling jig from a wooden yardstick matching the exact trim width ensured accurate, repeatable center points across new modern black bar pulls.
The Completed Transformation
After a four-week timeline, the hybrid finishing method turned a conflicting, dated kitchen into an integrated modern space. The bright perimeter cabinetry highlights the calacatta quartz, while the kitchen island painted in deep charcoal Sherwin-Williams Peppercorn anchors the floor plan. By investing in premium urethane coatings and proper surface preparation rather than expensive spray rigs or contractor labor, the transformation yielded an estimated $8,000 to $10,000 in savings. This proves that entry-level pneumatic tools can deliver high-end architectural results.
Smart preparation and the right chemical primers matter far more than expensive spray gear when refreshing older kitchen cabinetry.
Have you ever tackled an ambitious cabinet remodel using entry-level tools? Share your experiences with us in the comments section below!