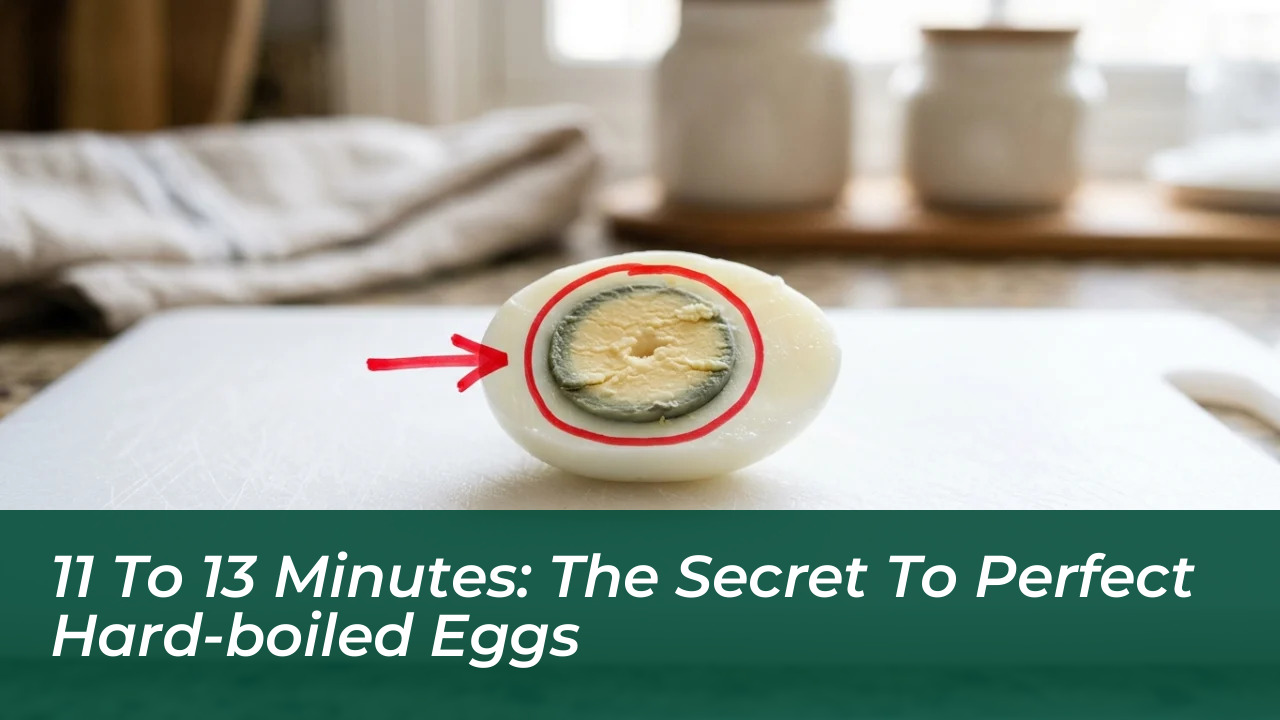

Leaving eggs submerged in hot water off the burner for 11 to 13 minutes yields tender whites and creamy centers without the unappealing gray-green sulfur ring. Rushing the cooking process over high heat often leads to cracked shells, rubbery whites, and dry yolks that crumble apart. Getting consistent results with hard-boiled eggs does not require vinegar or special kitchen gadgets; it comes down to basic thermodynamics, water volume, and halting the cooking process at the right moment.
Most home cooks treat egg boiling as an afterthought, cranking the stove to maximum heat and walking away. That aggressive bubbling violently knocks shells against each other and against the bottom of the pot, creating hairline fractures before the white can fully set. Controlling the physical movement of the eggs and regulating the temperature curve completely transforms the final texture.
The Chemistry Behind the Dreaded Gray-Green Ring
Finding a dark, discolored halo around a cooked yolk often leads people to believe the egg was spoiled. That discoloration is purely chemical: prolonged heat causes sulfur compounds within the egg white to react with iron in the yolk, forming ferrous sulfide right at the seam where the two meet. A chalky yolk surrounded by a discolored band is simply the result of excessive heat exposure.
While an overcooked egg remains safe to eat, its culinary quality plummets. The yolk loses its moisture and turns powdery, while the albumen takes on a rubbery bite. Avoiding that reaction requires abandoning the habit of letting eggs boil an extra few minutes.
Why Violent Boiling Cracks Delicate Shells
Dropping cold eggs straight from the refrigerator into an aggressive, rolling boil is the fastest way to rupture the shell. The immediate temperature difference causes rapid expansion, while vigorous convection currents slam the eggs against the pot sides. A crowded pan multiplies these mechanical collisions, sending white leaking into the water.
Starting eggs in a spacious pot allows you to arrange them in a single layer. Adding enough cold water so that the liquid sits an inch above the eggs distributes heat evenly, giving internal pressure time to stabilize before the water boils.
Myth-Busting: Do Vinegar and Lemon Juice Prevent Cracks?
A kitchen myth claims that pouring vinegar or lemon juice into the cooking water shields shells from fracturing. In reality, this does nothing to prevent physical impact damage inside a rattling pot. While an acidic environment may cause leaking white to coagulate slightly faster if a crack already exists, it will not protect the shell itself. Gentle heat management remains the only reliable safeguard against cracked shells.
Cooking Variable Best Practices
- Pot arrangement: Single, flat layer with room between eggs
- Water level: Submerged with at least an inch of water above
- Starting temperature: Submerged in cold water before heating
- Post-boil cooking: 11-13 minutes off heat with lid covered
- Cooling stage: Immediate transfer into an ice water bath
- Refrigerator storage: Chilled unpeeled for up to 7 days
The Step-by-Step Method for Consistent Hard-Boiled Eggs
Predictable cooking relies on eliminating uncontrolled variables on the stove. This resting method removes continuous burner heat from the equation entirely.
Place your eggs in an even layer at the bottom of a wide saucepan. Pour in cold tap water until the eggs are completely covered by at least an inch of liquid. Set the pot over medium-high heat and bring the water just to a boil. The moment a full boil begins, cover the pot with a tight lid and remove it completely from the heat source. Let the eggs sit undisturbed in the hot water for 11 to 13 minutes, depending on their size.
Transfer the eggs immediately into a bowl filled with very cold water or ice water to stop residual cooking. Residual heat inside the shell continues cooking the yolk long after the pot leaves the flame, making a rapid cold shock essential. Leaving cooked eggs in hot water while you finish other chores guarantees an overcooked yolk. Submerging them directly in cold water locks in the exact texture you worked to achieve, ensuring bright yellow yolks that slice cleanly.
Why Freshness Dictates How Easily Shells Peel
Struggling with stubborn shells rarely comes down to technique alone; the age of the egg plays a major role. Farm-fresh eggs have a lower internal pH, which causes the inner membrane to adhere tightly to the cooked albumen. As eggs sit in refrigeration for several days, moisture and carbon dioxide escape through the shell pores, allowing the membrane to detach more readily during peeling.
If you need visually pristine eggs for presentation, select cartons that have rested in the refrigerator for a few days rather than freshly bought farm eggs. The subsequent ice bath also contracts the egg slightly within its housing, assisting in a clean peel.
Handling, Food Safety, and Refrigeration
Eggshells possess a natural cuticle that serves as an antimicrobial barrier against outside contaminants. Washing eggs prior to long-term storage strips away this protective coating and invites bacteria into the porous shell. If an egg has surface debris, rinse it immediately before boiling rather than days in advance, and always wash your hands thoroughly after handling raw shells.
Once hard-boiled and cooled, eggs must be transferred to the refrigerator, where unpeeled specimens keep well for up to seven days. Cooked eggs should never sit at room temperature for more than two hours; once they cross that threshold, they must be discarded.
Small procedural shifts in the kitchen beat relying on gimmicks or aggressive heat. Setting a precise timer and cooling the eggs immediately turns an inconsistent chore into a reliable staple.