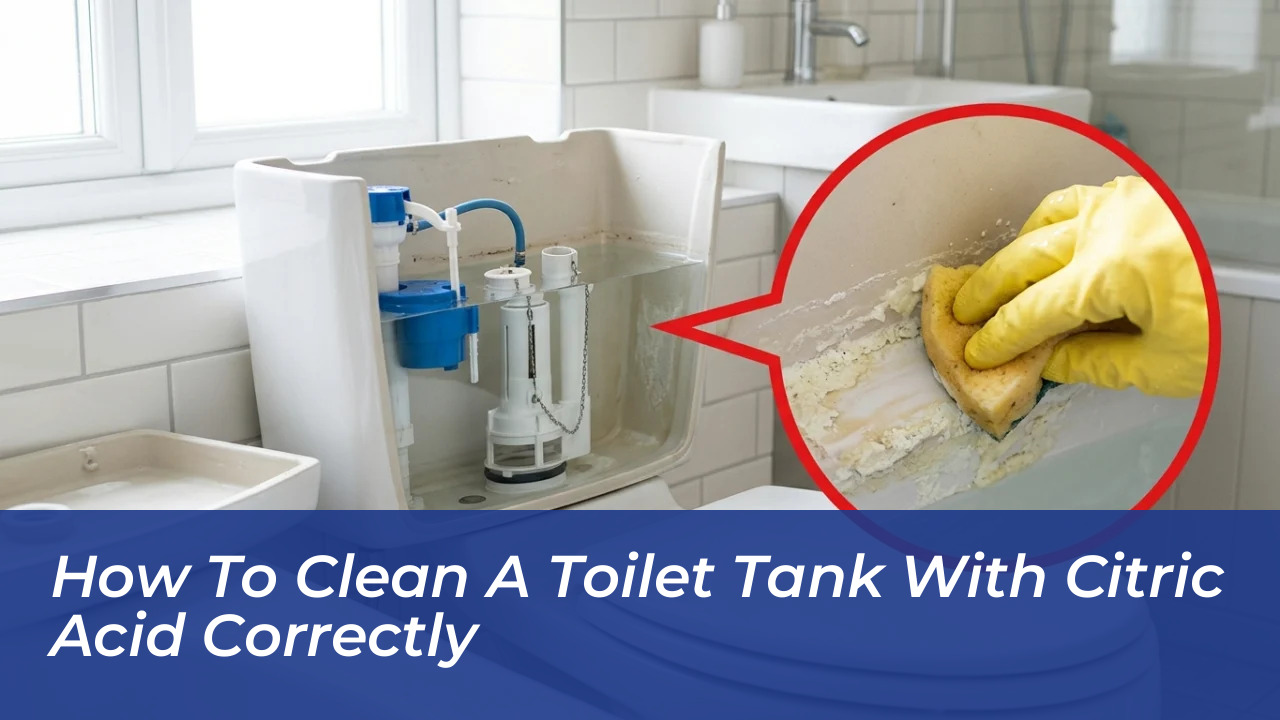

For years, many households spend valuable time scrubbing the toilet bowl until it sparkles, never once thinking about what is lurking beneath the heavy ceramic lid above it. The reality often hits when someone finally lifts the cover to find chalky white limescale and stubborn yellow mineral rings coating the walls and the flush valve. Dissolving those fresh deposits does not require harsh chemical fumes. Instead, a simple mixture of 2 to 3 tablespoons of citric dissolved in a quart of warm water can break down the crust in under an hour.
Most routine cleaning stops right at the water line of the bowl, leaving the reservoir completely neglected. Over time, hard tap water continuously deposits calcium, magnesium, and trace iron compounds against the porous porcelain and moving mechanical parts. Letting this residue accumulate silently causes sluggish flushing, stained rinse paths, and premature wear on internal rubber components.
The Hidden Mechanics Behind Tank Discoloration
The water sitting in your reservoir may appear crystal clear, yet it carries dissolved minerals that settle whenever the water remains still. Depending on your municipal supply or well depth, high concentrations of calcium carbonate crystallize into a rigid, off-white crust across the tank floor and intake valves. When the discoloration shifts to pale orange, tan, or deep yellow, minerals other than calcium are usually at play.
Dissolved iron compounds and minor plumbing corrosion oxidize inside the reservoir, staining surfaces that standard bowl cleaners never touch. Mineral accumulation inside a reservoir is primarily an inorganic chemical bond. Dissolving it requires controlled acidity rather than abrasive force that scratches porcelain and tears rubber seals.
Citric provides an effective, mild organic solution that reacts with these alkaline scale formations. Unlike abrasive cleaners that scuff plastic and ceramic surfaces, a mild acidic wash softens the crystalline lattice so it rinses away freely.
Essential Supplies for Safe Descaling
Before starting, gather the basic items needed for a controlled toilet tank cleaning session:
- 2 to 3 tablespoons of food-grade or technical citric powder
- 1 quart (about 1 liter) of warm water (never boiling)
- A soft sponge or a small, non-wire utility brush
- Heavy-duty protective rubber gloves
- An absorbent cleaning cloth or towel to protect surrounding flooring
Step-by-Step Tank Restoration Routine
Cleaning an internal flush system requires careful handling of fragile parts. Follow this measured process to clear buildup without damaging delicate internal plumbing:
- Shut off the water line: Locate the oval shut-off valve on the wall behind the base of the toilet and turn it clockwise until fully closed. Flush the toilet once or twice to evacuate as much standing water from the tank as possible.
- Remove the tank lid safely: Lift the ceramic lid straight up and place it flat on a folded towel on the floor. Ceramic covers are heavy, brittle, and easily cracked if bumped against tile.
- Mix and apply the solution: In a separate container, dissolve 2 to 3 tablespoons of citric into warm water. Pour the mixture into the reservoir so it coats the stained walls and base. For residue situated above the remaining liquid line, wet your sponge in the solution and dab it directly onto the crust.
- Allow the solution to work: Let the liquid sit undisturbed for 30 to 60 minutes. This gives the mild sufficient dwell time to soften hard calcium bonds without degrading rubber flappers.
- Wipe gently: Use a soft sponge or nylon brush to wipe away loosened grime. Avoid pulling, twisting, or applying heavy pressure to plastic floats, delicate linkages, or silicone seals.
- Restore water and flush: Reopen the wall valve counterclockwise, let the reservoir refill completely, and flush two to three times to thoroughly wash out any remaining acidic solution before replacing the lid.
Why Overnight Soaks Can Ruin Plumbing Parts
A widespread internet tip suggests dumping large amounts of dry into a full tank before going to bed. Applying prolonged baths to complex flush assemblies creates substantial risk for modern plumbing fixtures. Inside the tank sits a delicate balance of flexible rubber flappers, silicone diaphragms, plastic fill valves, and metallic pivot bolts. While porcelain withstands easily, prolonged contact with acidic water degrades synthetic elastomers, causing them to stiffen, blister, and leak.
Critical Danger: Never Mix with Bleach
The single most dangerous mistake during bathroom maintenance is combining acidic agents with chlorine-based drop-in tablets or bleach cleaners. Mixing citric with sodium hypochlorite triggers a volatile chemical reaction that instantly releases hazardous chlorine gas.
Always inspect the tank before adding any . If a blue or white chlorine sanitizing puck is already resting at the bottom, remove it with gloves, discard it, and flush the tank several times with clean water before introducing any acidic descaler.
Comparing Tank Cleaning Methods
Selecting the appropriate cleaning agent preserves your fixtures while effectively removing scale. The breakdown below outlines how common approaches compare:
- Diluted Citric : Mild, controlled 30 to 60 minute soak; targets calcium and iron safely without aggressive fumes.
- Chlorine Bleach Tabs: Disinfects water but fails to dissolve mineral scale; prolonged exposure hardens rubber seals.
- Abrasive Metal Scourers: Scratches protective porcelain glaze; risks fracturing thin plastic valve stems and float arms.
- Dry Powder Dumping: Creates high, unmeasured pockets directly against vulnerable base gaskets and bolts.
Identifying Underlying Mechanical Defects
While clearing scale improves overall hygiene, not every plumbing symptom stems from dirty water. Take advantage of an open tank to inspect the physical condition of the moving assemblies. If water constantly trickles into the bowl, if the fill valve emits a persistent high-pitched hiss, or if the unit takes unusually long to refill, mineral scale is rarely the primary culprit.
These symptoms point toward a worn-out flapper seal, a misadjusted float arm, or internal valve wear. No chemical cleaner will repair warped rubber or cracked plastic; physically replacing damaged mechanical hardware remains the only permanent fix. Inspecting the reservoir every few months allows you to address thin mineral films early, eliminating the need for aggressive measures down the line.