
High-end restaurants frequently showcase culinary plating on raw, sculpted stone, but handcrafted stone vessels can easily fetch $100 or more on artisan marketplaces. Instead of paying premium retail prices, designer Ben Uyeda demonstrated that anyone equipped with standard workshop tools can sculpt large river rocks into restaurant-worthy decorative and functional bowls in roughly 12 to 15 minutes per piece.
Sourcing 6- to 12-pound smooth stones from a local landscape supplier costs just $0.35 to $0.40 per pound, meaning the raw materials for a single centerpiece bowl run less than $5. With an efficient setup, you can fabricate four to five custom stone bowls in an hour, drastically undercutting commercial decor.
Essential Safety Gear and Tool Setup
Cutting and grinding dense stone produces fine masonry dust and high-velocity debris, making proper personal protective equipment an absolute necessity. Before powering on any machinery, creators should equip themselves with an N95 respirator to protect lung tissue, alongside impact-rated safety goggles and heavy-duty work gloves.
The core mechanical tools required for the project include:
- An angle grinder paired with a diamond tile-cutting blade
- A manual hand hammer and a standard cold chisel
- A ball grinder bit attached to an extension shaft for internal contouring
Stabilizing an irregularly shaped, rounded river rock presents the primary physical challenge during the grinding stage. While flat-bottomed stones can sometimes be secured in a heavy workbench vice, curved stones slip dangerously under heavy lateral pressure. Placing the rock inside a small, sturdy box filled with dry sand completely restricts movement while conforming naturally to the stone’s organic contours.
Step-by-Step Method: From Raw Stone to Polished Vessel
The secret to fast carving is avoiding direct hollow-grinding from the outset, which bogs down motors and wears out diamond blades prematurely. Instead, utilizing a controlled relief cutting strategy allows makers to knock out the bulk of the dense center within seconds using standard impact tools.
1. Flatten the Base
Use the angle grinder equipped with the diamond blade to cut a flat surface along the bottom of the stone. This ensures the finished bowl sits stably on tables and kitchen islands without rocking.
2. Score the Cavity
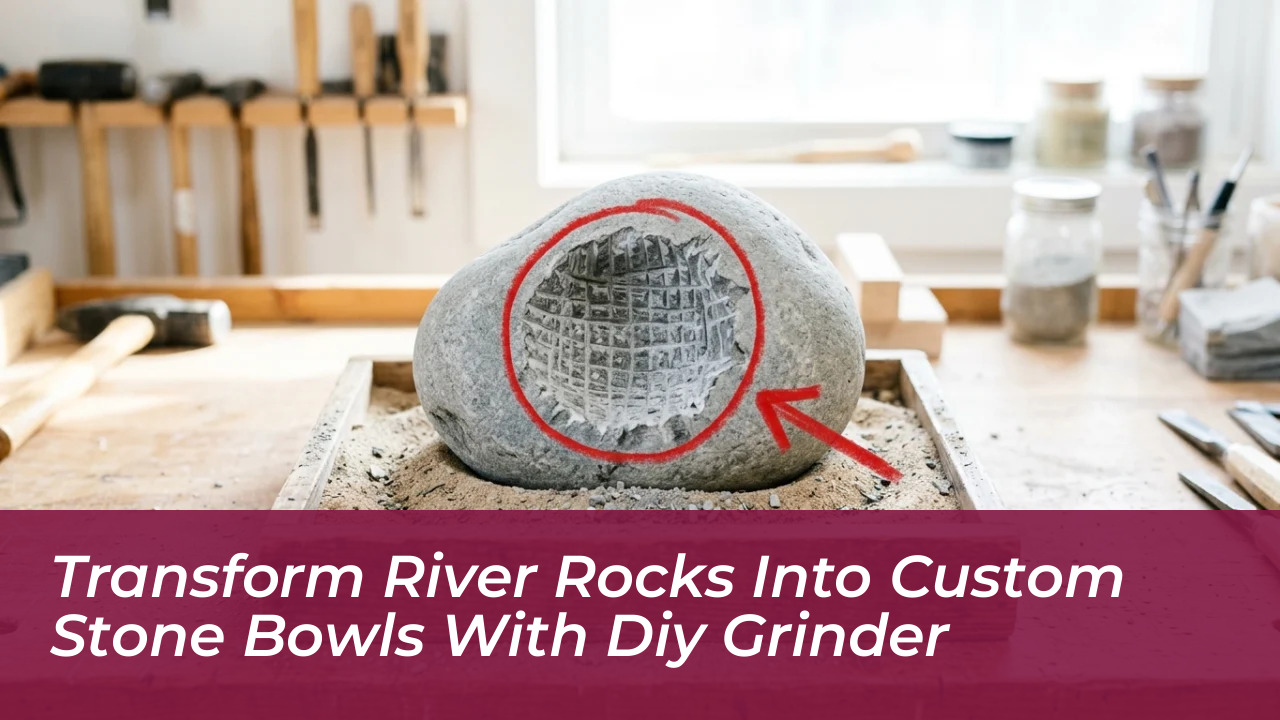
Flip the rock over and nestle it securely into your sandbox base. Use the diamond blade to make intersecting straight cuts across the designated bowl area, carving a grid pattern that creates small triangular stone pillars.
3. Chisel the Core
Place your cold chisel tip at the base of the scored stone triangles and strike firmly with the hammer. This technique quickly fractures and knocks out the brittle central chunks.
4. Smooth the Interior
Swap the blade on your angle grinder for a ball grinder attachment mounted on an extension shaft. Run the tool smoothly across the rough cavity until you achieve a uniform, contoured dish free of sharp ridges.
Project Costs and Resource Comparison
Deciding between buying commercial artisan stonework or building your own comes down to your personal budget and desired volume. The cost breakdown illustrates how accessible crafting these pieces is compared to retail purchasing:
- Etsy Small Hand-Carved Bowl: $20 or more
- Etsy Large Hand-Carved Bowl: $100 or more
- DIY Raw River Stone Material: $0.35 to $0.40 per pound
- DIY 6- to 12-lb Raw Vessel Base: Roughly $2.10 to $4.80
Busting the Misconception: Food Safety vs. Pure Decor
A widespread misconception is that any raw stone dish can immediately serve as a table-ready food vessel. Natural stone is highly porous, meaning unsealed rock will absorb moisture, trap bacterial food particles, and quickly stain when exposed to culinary fats or acids.
To safely serve snacks, dry goods, or fruit, apply a generous coat of food-grade mineral oil to the carved and cleaned surface. This creates a food-safe protective barrier that repels liquid absorption and makes routine washing simple. If you prefer a purely decorative aesthetic, porous stone takes acrylic paint exceptionally well for artistic patterns. However, standard acrylic paints are not food-safe, meaning painted variants should remain strictly decorative as entryway console catch-alls or accent centerpieces.