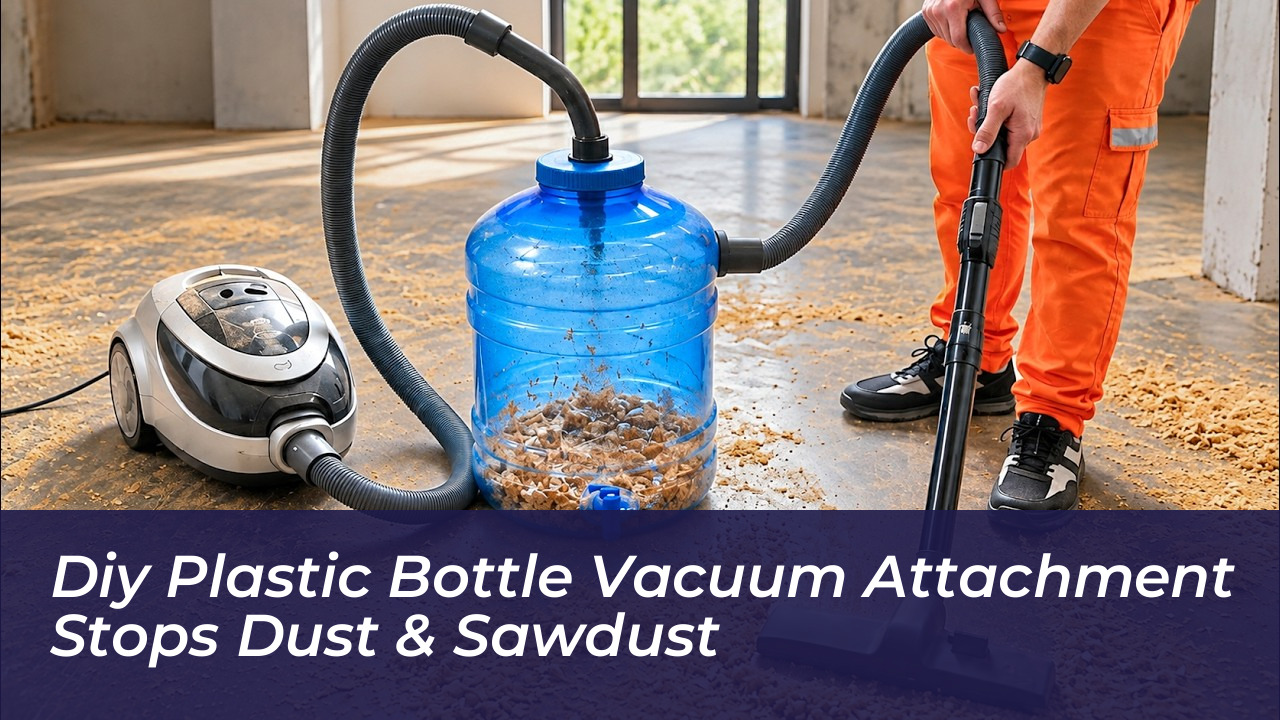

Attaching a repurposed plastic bottle as an inline separator stops fine workshop debris, plaster dust, and sawdust from instantly choking your vacuum cleaner filter. By forcing airborne dirt through a compact cyclonic chamber before it ever reaches the motor, this makeshift vacuum attachment preserves airflow and protects costly household appliances from premature burnout.
Anyone who has attempted to hoover up DIY grit, drill dust, or vehicle footwells knows the rapid drop in performance that follows. Standard domestic machines simply lack the filtration architecture needed for heavy particulates. Rather than burning out an expensive domestic hoover or splashing out on an industrial workshop extractor, understanding how air dynamics operate inside a common plastic vessel solves the problem for mere pennies.
Why Fine Debris Destroys Standard Vacuum Suction
Domestic vacuum cleaners rely on high-velocity airflow passing directly through paper bags or pleated micro-filters. When faced with ordinary household fluff, these systems cope admirably. However, woodworking shavings, car footwell silt, and renovation dust possess microscopic jagged profiles. These tiny fragments drive deep into filter pores within seconds, blinding the material and starving the motor of cooling air.
British consumer testing watchdog Which? has consistently highlighted that restricted airflow remains one of the primary culprits behind electric motor failure in bagless vacuums. When air cannot escape, the motor works twice as hard, overheats, and permanently loses suction power.
How the Inline Plastic Bottle Separator Works
The principle behind this conversion relies on rudimentary cyclonic separation-the identical physics utilised in multi-thousand-pound industrial dust collection plants across the United Kingdom. Air entering a cylindrical vessel at an offset angle is forced into a rapid downward spiral.
Centrifugal force flings heavier particles-such as coarse sawdust, screws, and dense soil-outwards against the bottle walls. Friction slows the debris down, causing it to fall harmlessly to the bottom of the container, while the relatively clean air vortex escapes through the central outlet pipe leading back to your hoover.
Assembling the Attachment with Common Workshop Scraps
Constructing an effective inline cyclonic vacuum attachment requires nothing more than an empty, rigid plastic bottle or container, two short sections of plastic conduit or PVC pipe, and a reliable sealant.
- Select a firm vessel: A rigid soft-drink bottle, milk bottle, or plastic tub works best, as weak containers can collapse inward under the vacuum’s negative pressure.
- Position the intake pipe: Bore a hole high up on the side of the bottle, inserting a pipe cut at an angle to introduce incoming debris tangentially against the inner wall.
- Fit the central suction outlet: Drill a hole through the top cap or lid, seating a straight exhaust pipe that extends roughly one-third of the way into the vessel, safely above the swirling debris line.
- Ensure an airtight seal: Apply hot melt glue or silicone sealant around all pipe joints to eliminate pressure leaks that disrupt the internal vortex.
- Fabricate a detailing nozzle: Heat the tip of a spare plastic pipe gently to pinch it into a slender crevice tool suited for tight automotive crevices.
Tackling Tight Car Corners and Workshop Dust
Vehicle interiors present an ideal proving ground for an inline pre-filter. Between seat tracks, door bins, and boot liners, automotive valeting pulls in heavy pebbles and coarse gravel that can rip standard vacuum hoses. Because the plastic container catches dense matter before it touches your vacuum bag, small dropped items like coins, nuts, or screws are saved from being lost in the main collection bin.
Emptying the system requires only unscrewing the bottle base, letting you dump heavy sawdust straight into the garden compost or recycling bin without generating a cloud of indoor dust. Crafting smart home adaptations proves that high performance does not demand specialised purchases.
A short visual demonstration highlights this setup in practical workshop conditions, showing just how much waste an ordinary drinks container can capture before your main appliance even breaks a sweat. Regular maintenance of your domestic vacuum remains essential, but diverting stubborn debris at the source drastically reduces the frequency of costly filter replacements. Taking twenty minutes to construct a modular dust trap gives your domestic cleaning kit the endurance of a trade-grade extractor without the hefty price tag.
Frequently Asked Questions About DIY Vacuum Separators
Will any plastic bottle work for an inline vacuum separator?
No, you should use a rigid plastic container, such as a thick soft-drink bottle or a milk jug. Thin or flimsy bottles will collapse inward under the intense negative pressure generated by your vacuum cleaner.
Do I still need a filter in my main vacuum if I use this attachment?
Yes. While the plastic bottle separator catches the vast majority of coarse debris and heavy dust, your main vacuum filter remains a critical secondary defense for microscopic particles.
How do I stop air leaks in my DIY separator?
Ensure all entry and exit points are tightly fitted. Applying hot melt glue, silicone sealant, or plumber’s tape around the pipe joints will secure an airtight vortex.
Can this setup handle liquids like water or wet spills?
This specific design is engineered for dry workshop debris, sawdust, and grit. Introducing liquids can damage standard dry vacuums unless you are using a purpose-built wet-and-dry system.
How often should I empty the plastic bottle separator?
You should empty the container whenever debris reaches just below the lower edge of the central exhaust pipe. Letting it overfill will cause the cyclonic action to fail, pulling debris directly into your hoover hose.